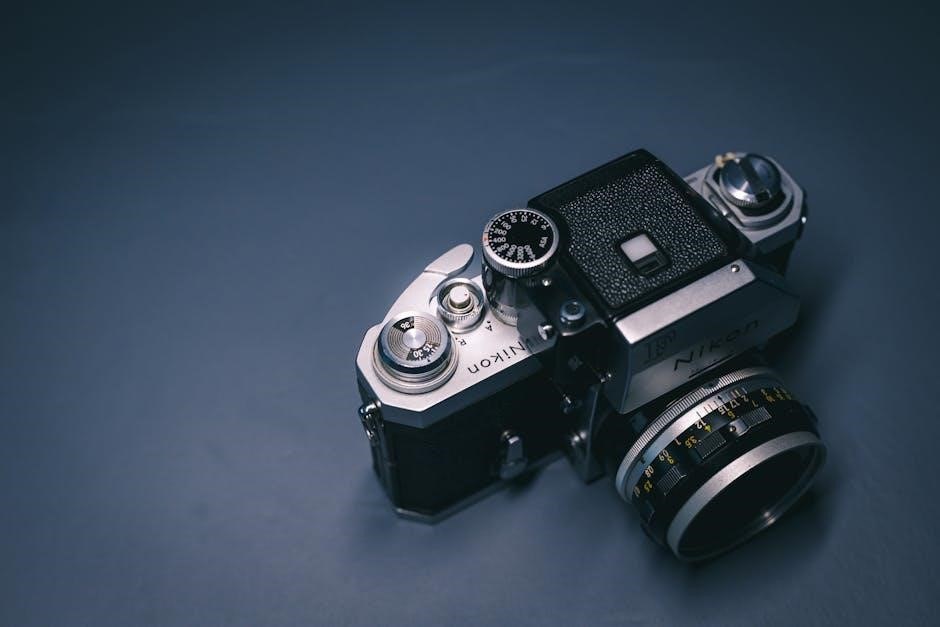
Nikon D5200 Camera Manual: A Comprehensive Guide
Welcome to the ultimate resource for mastering your Nikon D5200! This guide offers detailed instructions, helpful tips, and creative techniques to unlock the full potential of your DSLR camera.
The Nikon D5200 is a versatile and user-friendly DSLR camera that’s perfect for both beginners and experienced photographers looking to capture stunning images and Full HD videos. This comprehensive guide will walk you through every aspect of the camera, from its basic features to more advanced settings, ensuring you get the most out of your photographic journey.
Released as part of Nikon’s popular D5000 series, the D5200 boasts a 24.1-megapixel DX-format CMOS sensor, allowing you to capture images with exceptional detail and clarity. Its vari-angle LCD monitor provides creative flexibility, enabling you to shoot from various angles and perspectives. Whether you’re capturing landscapes, portraits, or action shots, the D5200 offers a range of features to suit your needs.
This manual goes beyond the standard documentation, offering practical advice and real-world examples to help you understand when and why to use specific settings. We’ll explore the camera’s various shooting modes, menu options, and customization features, empowering you to take control of your photography. Additionally, we’ll cover essential topics such as troubleshooting common issues and keeping your camera’s firmware up to date.
By the end of this guide, you’ll have a solid understanding of your Nikon D5200 and be equipped with the knowledge and skills to capture breathtaking photos and videos. So, grab your camera, and let’s dive in!
This guide contains up-to-date information, incorporating recent firmware updates and software releases that enhance the D5200’s performance and capabilities. Whether you are a novice or a seasoned photographer, the guide will prove to be an invaluable resource.
Let’s get started and unlock the full potential of your Nikon D5200!
Key Features and Specifications
The Nikon D5200 is packed with features designed to enhance your photography experience. Understanding these key features and specifications is crucial for maximizing the camera’s potential and capturing the best possible images. Here’s a detailed overview of what the D5200 has to offer:
- 24.1-Megapixel DX-Format CMOS Sensor: This high-resolution sensor captures images with incredible detail and sharpness, allowing for significant cropping and enlargement without sacrificing image quality.
- EXPEED 3 Image Processor: Nikon’s EXPEED 3 image processor ensures fast performance, accurate color reproduction, and excellent noise reduction, even at high ISO settings.
- ISO Range of 100-6400 (Expandable to 25600): The wide ISO range enables you to shoot in various lighting conditions, from bright daylight to dimly lit environments, with minimal noise.
- 39-Point Autofocus System: The advanced autofocus system provides fast and accurate focusing, ensuring your subjects are sharp and clear, even when in motion.
- 5 fps Continuous Shooting: Capture fast-action sequences with a continuous shooting speed of up to 5 frames per second, ensuring you don’t miss a crucial moment.
- 3-inch Vari-Angle LCD Monitor: The tilting and swiveling LCD monitor allows for creative shooting from various angles, making it easy to compose shots from high or low perspectives.
- 1080p Full HD Video Recording: Record high-quality videos with smooth and detailed footage, perfect for capturing memories or creating professional-looking videos.
- Built-in Stereo Microphone: The built-in stereo microphone captures clear audio for your videos, enhancing the overall viewing experience.
- Scene Modes: Choose from a variety of scene modes, such as Portrait, Landscape, and Sports, to optimize camera settings for specific shooting situations.
- Special Effects Mode: Experiment with creative effects, such as Selective Color, Miniature, and High Key, to add a unique touch to your images and videos.
- RAW (NEF) Image Recording: Capture images in RAW format to retain maximum image data, allowing for greater flexibility during post-processing and editing.
These features, combined with the camera’s intuitive interface and ergonomic design, make the Nikon D5200 an excellent choice for photographers of all skill levels.
Understanding Shooting Modes
The Nikon D5200 offers a variety of shooting modes, each designed to cater to different shooting scenarios and levels of user control. Mastering these modes is essential for capturing the perfect shot in any situation. Here’s a breakdown of the key shooting modes available on the D5200:
- Auto Mode: The camera automatically adjusts all settings for optimal results. Ideal for beginners or situations where quick shooting is necessary.
- Auto (Flash Off) Mode: Similar to Auto mode but disables the flash. Useful in situations where flash photography is not allowed or desired.
- Scene Modes: The D5200 offers a range of scene modes, each optimized for specific shooting conditions. Examples include:
- Portrait: Optimizes settings for capturing flattering portraits with blurred backgrounds.
- Landscape: Enhances colors and sharpness for stunning landscape photos.
- Child: Captures bright and vibrant images of children with fast shutter speeds to freeze motion.
- Sports: Uses fast shutter speeds to capture action shots with minimal blur.
- Close-up: Optimizes settings for capturing detailed close-up shots of small subjects.
- Night Portrait: Balances the subject and background exposure in low-light portrait shots.
- Night Landscape: Captures clear and detailed night scenes with reduced noise.
- Effects Mode: This mode allows you to apply creative effects to your photos and videos. Some popular effects include:
- Selective Color: Retains a specific color while converting the rest of the image to black and white.
- Miniature Effect: Creates a diorama-like effect by blurring the top and bottom of the image.
- High Key: Produces bright and airy images with a light and cheerful feel.
- Low Key: Creates dark and dramatic images with deep shadows.
- Programmed Auto (P) Mode: The camera automatically selects the aperture and shutter speed, but you can adjust other settings like ISO and white balance. Offers more control than Auto mode.
- Shutter-Priority Auto (S) Mode: You select the shutter speed, and the camera automatically adjusts the aperture. Ideal for controlling motion blur or freezing action.
- Aperture-Priority Auto (A) Mode: You select the aperture, and the camera automatically adjusts the shutter speed; Useful for controlling depth of field.
- Manual (M) Mode: You have full control over both aperture and shutter speed, allowing for complete creative control. Requires a good understanding of exposure principles.
Experimenting with each of these shooting modes will help you understand their strengths and weaknesses, enabling you to choose the best mode for any given situation.
Navigating the Camera Menu
The Nikon D5200’s menu system provides access to a wide range of camera settings, allowing you to customize the camera’s behavior and optimize image quality. Understanding how to navigate the menu is crucial for unlocking the camera’s full potential. Here’s a guide to the D5200’s menu structure and key settings:
- Accessing the Menu: Press the “MENU” button on the back of the camera to access the main menu screen.
- Menu Structure: The menu is divided into several sections, each containing related settings:
- Playback Menu: This menu allows you to review, protect, delete, and edit your photos and videos. You can also view slideshows and adjust playback settings.
- Shooting Menu: This menu contains settings related to image quality, image size, ISO sensitivity, white balance, and other shooting parameters.
- Setup Menu: This menu allows you to configure general camera settings, such as language, date and time, monitor brightness, and video output.
- Retouch Menu: This menu provides a range of in-camera image editing tools, allowing you to apply filters, adjust brightness, and perform other enhancements.
- Recent Settings: This menu displays the settings you’ve recently modified, providing quick access to frequently used options.
- Navigation: Use the multi-selector (the directional pad on the back of the camera) to navigate through the menu options. Press the “OK” button to select a menu item or confirm a setting.
- Key Settings in the Shooting Menu:
- Image Quality: Choose the desired image quality setting (e.g., JPEG Fine, JPEG Normal, RAW) to control the level of compression and detail in your photos.
- Image Size: Select the image size (e.g., Large, Medium, Small) to determine the resolution of your photos.
- ISO Sensitivity Settings: Adjust the ISO sensitivity to control the camera’s sensitivity to light. Higher ISO settings are useful in low-light situations, but can introduce more noise.
- White Balance: Select the appropriate white balance setting to ensure accurate color reproduction in different lighting conditions.
- Picture Control: Choose a Picture Control setting (e.g., Standard, Neutral, Vivid) to customize the look and feel of your photos.
- Customizing the Menu: The D5200 allows you to customize the menu by adding frequently used settings to the “My Menu” section. This provides quick access to the settings you use most often.
- Menu Help: Press the “?” button to display a brief explanation of the selected menu item.
By familiarizing yourself with the D5200’s menu system, you can quickly and easily adjust camera settings to suit your specific needs and shooting style.
Custom Settings and Personalization
The Nikon D5200 offers a range of custom settings and personalization options, allowing you to tailor the camera’s behavior to your specific shooting preferences and needs. By exploring these settings, you can optimize your workflow and create a more personalized shooting experience. Here’s an overview of some key customization options:
- Custom Functions: The D5200 provides access to several custom functions that allow you to modify the behavior of certain buttons and dials. This can streamline your shooting process and make frequently used settings more accessible.
- Button Customization: You can assign different functions to the Fn (Function) button on the front of the camera. This allows you to quickly access settings such as ISO sensitivity, white balance, or Active D-Lighting.
- Command Dial Customization: The command dial can be customized to control different settings depending on the shooting mode. For example, in aperture-priority mode, you can use the command dial to adjust the aperture, while in shutter-priority mode, you can use it to adjust the shutter speed.
- Auto ISO Sensitivity Control: The D5200 allows you to configure the Auto ISO sensitivity control, which automatically adjusts the ISO sensitivity to maintain proper exposure in varying lighting conditions. You can set the maximum ISO sensitivity and the minimum shutter speed to prevent excessive noise or blur.
- Release Mode: Customize the release mode to suit your shooting style. Options include single-frame, continuous shooting, self-timer, and quiet shutter release.
- AF-Area Mode: Select the appropriate AF-area mode to optimize autofocus performance for different subjects and shooting situations. Options include single-point AF, dynamic-area AF, auto-area AF, and 3D-tracking.
- Metering Mode: Choose the desired metering mode to control how the camera measures the brightness of the scene. Options include matrix metering, center-weighted metering, and spot metering.
- Monitor Brightness: Adjust the brightness of the camera’s LCD monitor to ensure comfortable viewing in different lighting conditions.
- Information Display: Customize the information displayed on the camera’s LCD monitor to show the settings that are most important to you.
- Shooting Information Display: The shooting information display can be customized to show various shooting parameters, such as aperture, shutter speed, ISO sensitivity, and exposure compensation.
- My Menu: Create a personalized menu with your most frequently used settings for quick and easy access.
By taking the time to explore and customize these settings, you can optimize your Nikon D5200 for your specific shooting style and create a more efficient and enjoyable photography experience.
Troubleshooting Common Issues
Even with its user-friendly design, the Nikon D5200 may occasionally encounter issues. Here’s a troubleshooting guide to address some common problems:
- Camera Won’t Turn On:
- Ensure the battery is properly inserted and fully charged.
- Check the battery contacts for dirt or corrosion and clean them if necessary.
- If using an AC adapter, verify that it’s securely connected to both the camera and a working power outlet.
- Image is Too Dark or Too Bright:
- Adjust the exposure compensation setting to fine-tune the brightness of the image.
- Check the metering mode and select the appropriate mode for the shooting situation.
- Ensure that the ISO sensitivity is set correctly for the lighting conditions.
- Image is Blurry:
- Make sure the lens is properly focused on the subject. Use autofocus or manual focus as needed.
- Increase the shutter speed to prevent motion blur, especially in low light.
- Use a tripod to stabilize the camera and eliminate camera shake.
- Error Messages Displayed:
- Refer to the camera’s manual for specific error code explanations and recommended solutions.
- Try turning the camera off and on again to reset the system.
- If the error persists, contact Nikon customer support for assistance.
- Autofocus Not Working:
- Ensure that the lens is set to autofocus mode (AF).
- Check the AF-area mode and select the appropriate mode for the subject.
- Make sure the subject is within the lens’s focusing range.
- Memory Card Issues:
- Verify that the memory card is compatible with the D5200 (SD, SDHC, SDXC).
- Ensure the memory card is properly inserted into the card slot.
- Try formatting the memory card in the camera (note: this will erase all data on the card).
- If the card is damaged or corrupted, replace it with a new one.
- Flash Not Firing:
- Ensure that the flash is enabled in the camera’s menu settings.
- Check the flash mode and select the appropriate mode for the shooting situation.
- Make sure the flash is fully charged before attempting to use it.
- Images Have Color Cast:
- Adjust the white balance setting to match the lighting conditions.
- Use a gray card to set a custom white balance for accurate color reproduction.
- Video Recording Issues:
- Ensure that the memory card has enough free space to record the video.
- Check the video settings and select the desired resolution and frame rate.
If you encounter any other issues with your Nikon D5200, consult the camera’s manual or contact Nikon customer support for further assistance. Regular maintenance and proper handling can help prevent many common problems.
Downloading and Updating Firmware
Keeping your Nikon D5200’s firmware up-to-date is crucial for optimal performance, bug fixes, and access to new features. Here’s a step-by-step guide on how to download and install firmware updates:
- Check Your Current Firmware Version:
- Turn on your Nikon D5200.
- Go to the camera’s menu.
- Navigate to the “Setup” menu (usually represented by a wrench icon).
- Select “Firmware Version”.
- Note the current firmware version for both the camera body and the lens (if applicable).
- Visit the Nikon Download Center:
- Go to the official Nikon website and navigate to the “Support” or “Download Center” section.
- Search for the Nikon D5200 firmware update.
- Ensure you select the correct firmware version for your camera model and region.
- Download the Firmware Update:
- Read the instructions and precautions carefully before downloading the firmware update file.
- Download the firmware update file to your computer. The file is usually compressed in a ZIP format.
- Prepare the Memory Card:
- Format an SD memory card using your Nikon D5200. This will ensure compatibility and prevent errors.
- Extract the firmware update file from the ZIP archive. You should find a file with a “.BIN” extension.
- Copy the “.BIN” file to the root directory of the formatted SD memory card. Do not place it in any folder.
- Install the Firmware Update:
- Turn off your Nikon D5200.
- Insert the SD memory card containing the firmware update file into the camera.
- Turn on the camera.
- Go to the camera’s menu.
- Navigate to the “Setup” menu.
- Select “Firmware Version”.
- Select “Update”.
- Follow the on-screen instructions to begin the firmware update process.
- Important Precautions:
- Do not turn off the camera or remove the battery or memory card during the firmware update process.
- Ensure that the camera has sufficient battery power before starting the update.
- The update process may take several minutes. Be patient and do not interrupt the process.
- Verify the Update:
- After the update is complete, turn off the camera and then turn it back on.
- Go to the “Firmware Version” menu again to verify that the firmware has been updated to the latest version.
By following these steps, you can easily download and install firmware updates for your Nikon D5200, ensuring that your camera is running at its best.